This guide details how to use the Advanced Attributes System in an Unreal Engine 5 project after integration. Developers will learn key workflows for modifying attributes, setting up regeneratable attributes, configuring associated attributes, creating custom extended attributes, and displaying attributes on the HUD. The guide also covers customization tasks to extend the system for project-specific needs, ensuring effective use in Action RPGs or similar genres.
Modifying Attributes
-
In the Blueprint of the actor with the
BP_AttributesComponent, get a reference to the component. -
Call
ModifyAttributeto adjust an attribute’s current value:Get BP_AttributesComponent -> ModifyAttribute (AttributeTag: Attribute.Health, Value: -10) -
Use dispatchers like
OnAttributeValueModifiedto trigger other logic (e.g., updating UI or triggering abilities):BP_AttributesComponent -> OnAttributeValueModified -> Custom Event (Update HUD or Trigger Ability)
Setting and Retrieving Attribute Values
-
To set an attribute value directly:
BP_AttributesComponent -> SetCurrentAttributeValue (AttributeTag: Attribute.Stamina, Value: 50) -
To retrieve an attribute’s current value:
BP_AttributesComponent -> GetCurrentAttributeValue (AttributeTag: Attribute.Stamina) -> Print String -
Use other getter functions like
GetBaseAttributeValueorGetMultiplierValuefor specific needs.
Creating a Regeneratable Attribute
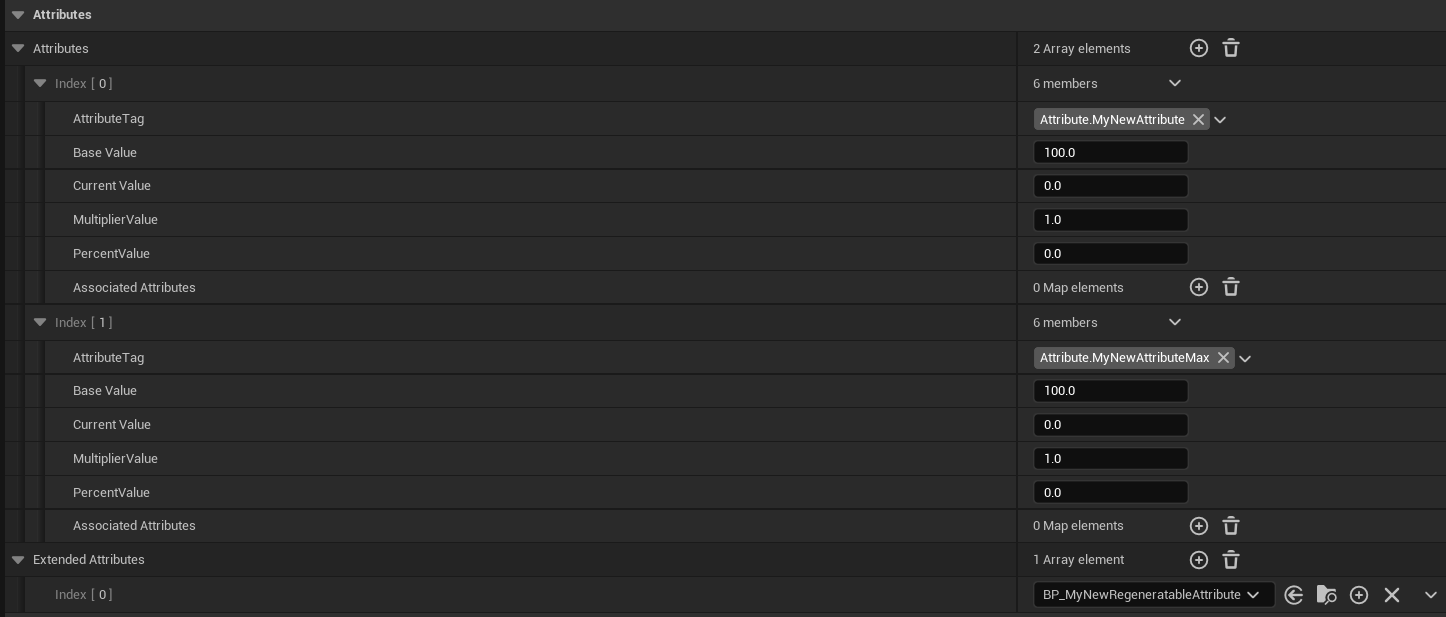
- Define the attribute and its max counterpart in the
Attributesarray:- Add
Attribute.MyNewAttribute(Base Value: 100). - Add
Attribute.MyNewAttributeMax(Base Value: 100).
- Add
- Create a new Blueprint class inheriting from
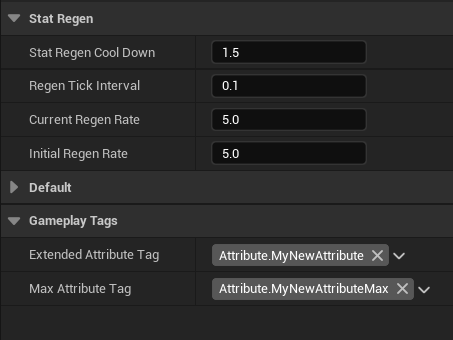
BP_BaseRegeneratableAttribute(e.g.,BP_MyNewRegeneratableAttribute). - In the new class’s Defaults:
- Set
ExtendedAttributeTagtoAttribute.MyNewAttribute. - Set
MaxAttributeTagtoAttribute.MyNewAttributeMax. - Adjust
RegenRate,RegenTickInterval, andRegenCoolDownas needed (e.g., RegenRate = 5, RegenTickInterval = 1).
- Set
- Add the new extended attribute to the
ExtendedAttributesarray:- If standalone, add to the
BP_AttributesComponentin the actor’s Details panel. - If using Advanced ARPG Combat, add to the
PlayerInfoDataAssetorEnemyInfoDataAsset.
- If standalone, add to the
- Add a
WB_AttributeProgressBarto the HUD:- Set
AttributeTagtoAttribute.MyNewAttributeandMaxAttributeTagtoAttribute.MyNewAttributeMax. - Initialize the progress bar in the HUD’s Event Graph (unless using Advanced ARPG Combat’s default HUD).
- Set
NOTE:
If using the included Combat Systems HUD (
MainHUD), add your new attribute progress bar to theAttributeBarsVerticalBoxand the attribute bar will be initialized for you. You MUST add your attribute bar to that vertical box before automatic initialization will work.
-
Test by modifying the attribute (e.g., subtract 25) and observing regeneration:
InputAction IA_TestAttribute (Pressed) -> ModifyAttribute (AttributeTag: Attribute.MyNewAttribute, Value: -25)
Configuring Associated Attributes
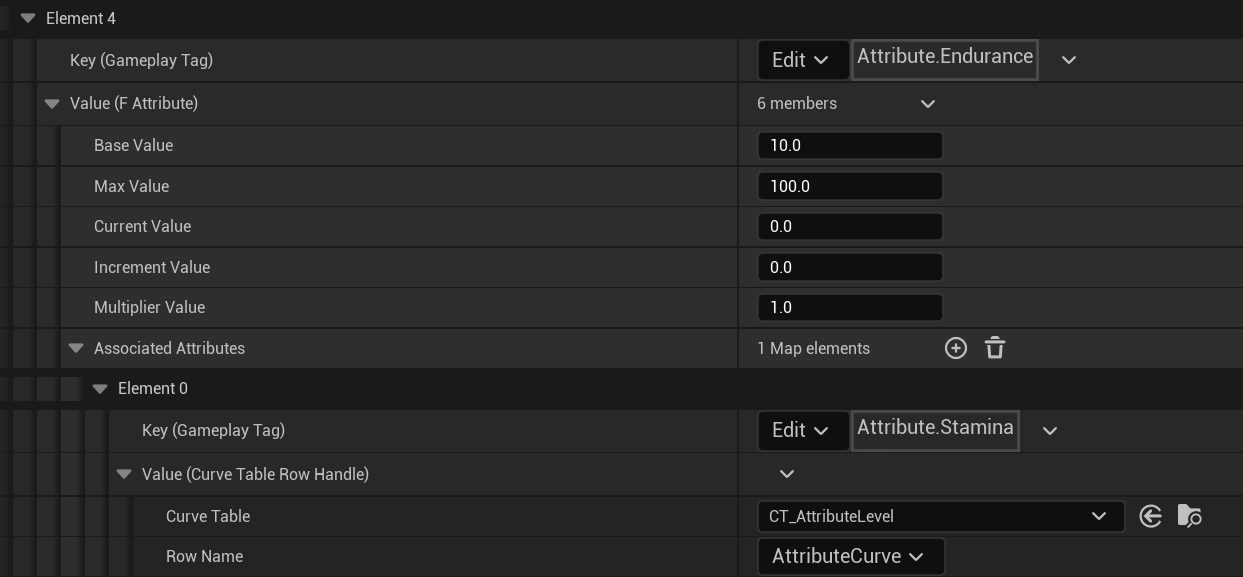
- In the
Attributesarray, select the governing attribute (e.g.,Attribute.Endurance). - In the
AssociatedAttributesmap, add an entry:- Key: The governed attribute tag (e.g.,
Attribute.Stamina). - Value: A Curve Table row defining the relationship (e.g., a curve where X is Endurance value and Y is Stamina value).
- Key: The governed attribute tag (e.g.,
- Create or modify a Curve Table:
- In the Content Browser, create a new
Curve Tableasset. - Add a curve row, adjusting values to define the relationship (e.g., linear increase or diminishing returns).
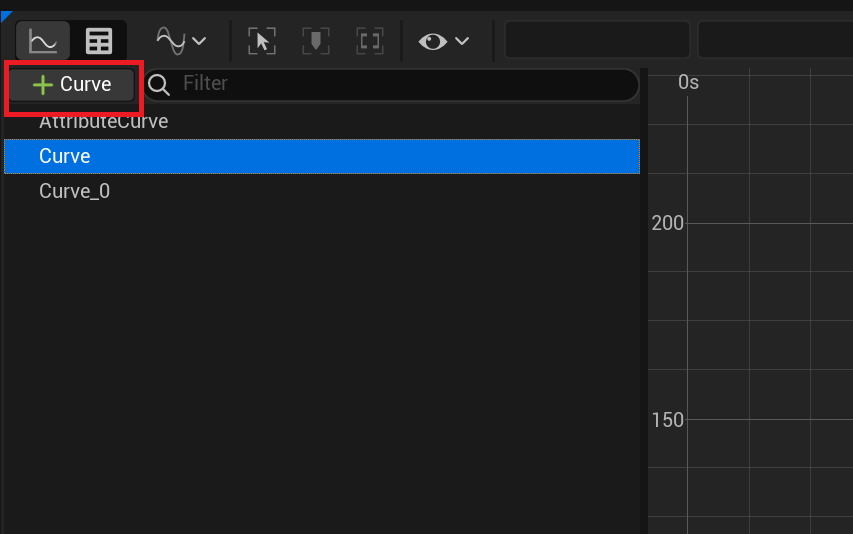
- In the Content Browser, create a new
- Test by modifying the governing attribute and checking the governed attribute’s value:
ModifyAttribute (AttributeTag: Attribute.Endurance, Value: 10) -> GetCurrentAttributeValue (AttributeTag: Attribute.Stamina) -> Print String
Creating Custom Extended Attributes
-
Create a new Blueprint class inheriting from
BP_BaseExtendedAttribute(e.g.,BP_HealthExtendedAttribute). -
Implement custom logic in functions like
OnAttributeValueModified:OnAttributeValueModified -> If GetCurrentAttributeValue (Attribute.Health) <= 0 -> Trigger Death Ability -
Add the new class to the
ExtendedAttributesarray in theBP_AttributesComponentor relevant data asset. -
Test by modifying the associated attribute and verifying the custom logic triggers.
Troubleshooting
- Attributes Not Updating:
- Verify
AttributeTagexists in the Gameplay Tags table. - Ensure
BP_AttributesComponentis initialized onEvent BeginPlay.
- Verify
- Regeneration Not Working:
- Confirm
BP_BaseRegeneratableAttributeis inExtendedAttributes. - Check
RegenRateandRegenTickIntervalare non-zero.
- Confirm
- HUD Not Displaying:
- Ensure
WB_AttributeProgressBaris initialized with a validBP_AttributesComponent. - Verify
AttributeBarsVerticalBoxis used for Advanced ARPG Combat’sMainHUD.
- Ensure
- Associated Attributes Not Scaling:
- Check the Curve Table row is correctly assigned in the
AssociatedAttributesmap. - Verify the governing attribute’s value is being modified.
- Check the Curve Table row is correctly assigned in the
Best Practices
- Workflows:
- Centralize attribute setup in
PlayerInfoDataAssetorEnemyInfoDataAssetfor consistency. - Use
WB_AttributeProgressBarfor essential attributes only to maintain clean HUDs.
- Centralize attribute setup in
- Pitfalls to Avoid:
- Don’t use duplicate
AttributeTagvalues inAttributesto prevent conflicts. - Avoid complex logic in
OnAttributeValueModifiedto maintain responsiveness.
- Don’t use duplicate
- Performance Considerations:
- Minimize
ExtendedAttributesper actor to reduce overhead. - Optimize
AssociatedAttributescurves by avoiding overly complex calculations. - Disable
bUpdateAttributeLerpBarfor non-critical HUD attributes to improve performance.
- Minimize