Follow these steps to integrate the Advanced Interaction System into a new Unreal Engine 5 project. These steps are necessary for custom setups, as the system is pre-configured in the default project included with Advanced ARPG Combat.
- Prerequisites:
- Unreal Engine 5.3 or later.
- A pawn (e.g., player character) to host the interaction component.
- An actor to interact with in the project.
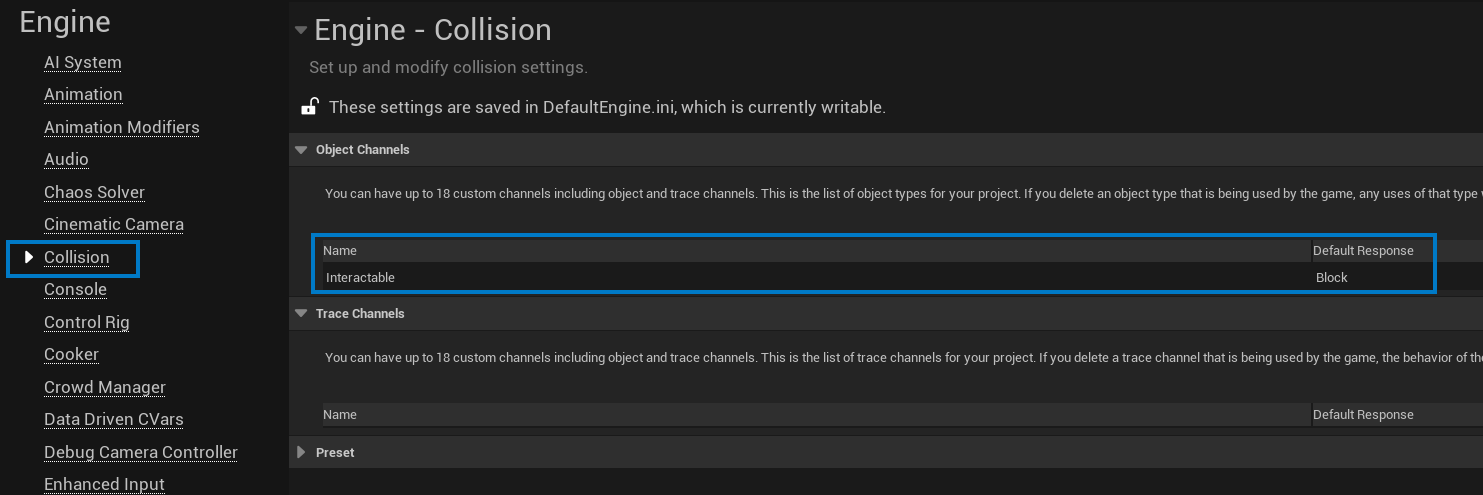
- Add the Interactable Object Type:
- Navigate to Project Settings > Collision > Object Channels.
- Add a new object channel named
Interactable. - Set the default response to Block.
- Note: This step is critical, as the system relies on the
Interactableobject type for tracing.
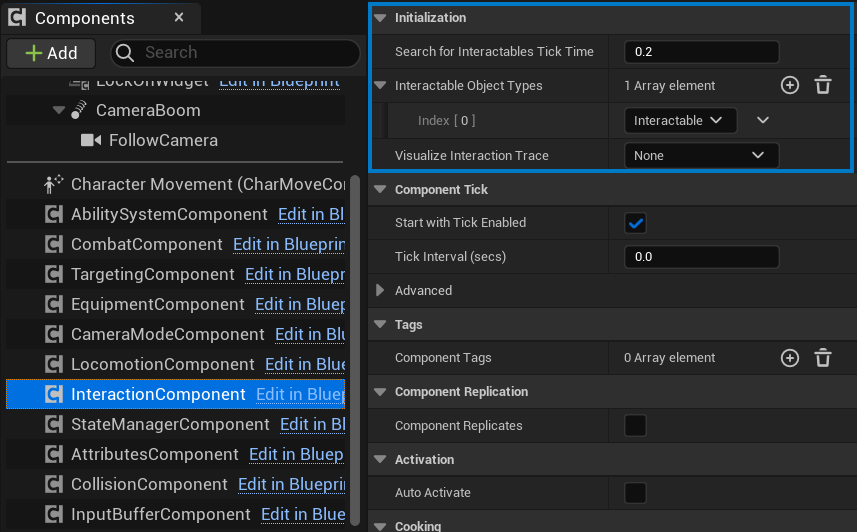
- Add the Interaction Component:
- Open the Blueprint of the pawn that will perform interactions (e.g., player character).
- In the Components panel, click Add Component and select
BP_InteractionComponent. - Select the
BP_InteractionComponentin the Details panel and configure properties as needed:SearchForInteractablesTickTime: Set the interval for searching (e.g., 0.1 seconds).InteractableObjectTypes: EnsureInteractableis included.VisualizeInteractionTrace: Enable for debug visibility during testing.
-
Initialize the Component:
- In the pawn’s Blueprint, on the Event BeginPlay node, call the
Initializefunction onBP_InteractionComponentto start the interactable search.
- In the pawn’s Blueprint, on the Event BeginPlay node, call the
-
Set Up Input Bindings Using Enhanced Input:
- Navigate to Project Settings > Input > Input Actions.
- Create a new Input Action asset named
IA_Interact(e.g., create a new asset in the Content Browser underContent/Input/Actions). - In the
IA_Interactasset, add a key mapping (e.g., “E” key) under Mappings. - In Project Settings > Engine > Input, under Bindings, assign the
IA_InteractInput Action. - Ensure the project uses the Enhanced Input System:
- In Project Settings > Game > Default Classes, set the Default Pawn Class to use a Blueprint with an Enhanced Input Component (or add it to your pawn).
- In Project Settings > Input > Default Input Component Class, select
EnhancedInputComponent.
- In the pawn’s Blueprint:
- Add an Input Mapping Context asset (e.g., create
IMC_DefaultinContent/Input). - Map
IA_Interactto theIMC_Defaultcontext in the Input Mapping Context asset. - On Event BeginPlay, call
Add Mapping Context(from the Player Controller) to applyIMC_Default. - Bind the
IA_Interactaction to a function:- In the Blueprint graph, add an Input Action node for
IA_Interact(using the Enhanced Input Component). - Connect the Triggered pin to call the
ToggleInteractionfunction onBP_InteractionComponent.
- In the Blueprint graph, add an Input Action node for
- Add an Input Mapping Context asset (e.g., create

- Test with Default Interactable Actors:
- Place an instance of
BP_Interactable(included with the system) in the level. This actor is pre-configured withBP_InteractionInterfaceand a Widget Component forWB_InteractableWidget. - Ensure its collision settings respond to the
Interactableobject type. - Playtest to verify that the system detects the actor and displays the
WB_InteractableWidget(e.g., “Press [E] to interact”).
- Place an instance of
Troubleshooting:
- If interactables are not detected, verify that the
Interactableobject type is added in Project Settings > Collision and included in theInteractableObjectTypesproperty ofBP_InteractionComponent. - If the interaction widget doesn’t appear, ensure that
BP_Interactablehas a Widget Component with the Widget Class set toWB_InteractableWidget. - If interactions don’t trigger, check that the
IA_InteractInput Action is bound in the Input Mapping Context and that the Enhanced Input Component is set up correctly in the pawn.