This guide explains how to use the Advanced Interaction System once it is set up. It is divided into sections for key operational and customization tasks, ensuring developers can quickly understand how to interact with and extend the system.
Initiating an Interaction
- Ensure the
IA_InteractInput Action is bound to a key (e.g., “E”) in the Input Mapping Context. - Approach an interactable actor (e.g.,
BP_Interactable); the system automatically detects it viaSearch for Interactablesand displays the interaction widget (e.g., “Press [E] to interact”). - Press the bound key to trigger the
IA_Interactaction, which callsToggleInteractiononBP_InteractionComponent, initiatingBeginInteractionand sending theInteractevent to the interactable actor to start actions like playing an animation or opening a menu.
Ending an Interaction
- While interacting (i.e.,
IsInteractingreturns true), press theIA_Interactkey again. ToggleInteractioncallsEndInteraction, setting the interaction state to false and sending theEndInteractionevent to the interactable actor to clean up (e.g., close a menu or stop an animation).
Creating a Custom Interactable Actor
- Create a new actor Blueprint or open an existing one (e.g., a loot chest, NPC, or bonfire).
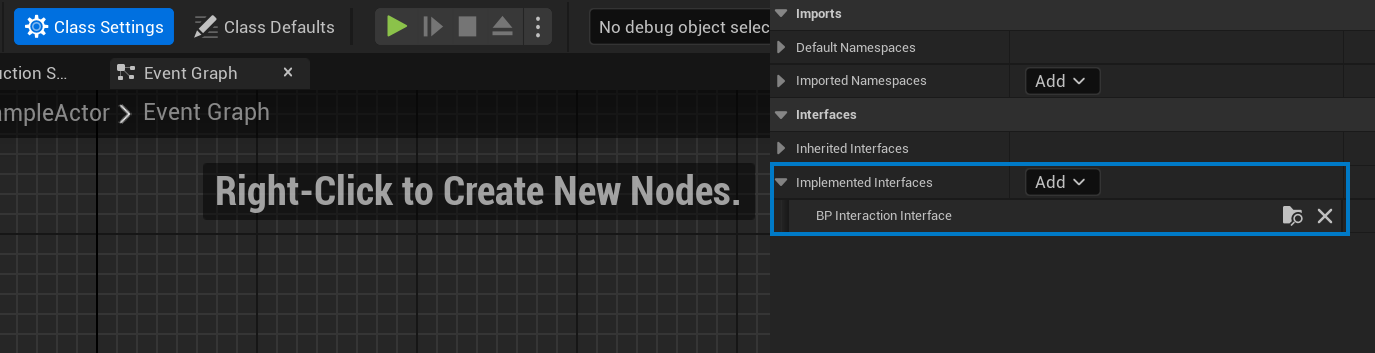
- In the Class Defaults, add the
BP_InteractionInterfaceto the Interfaces list.
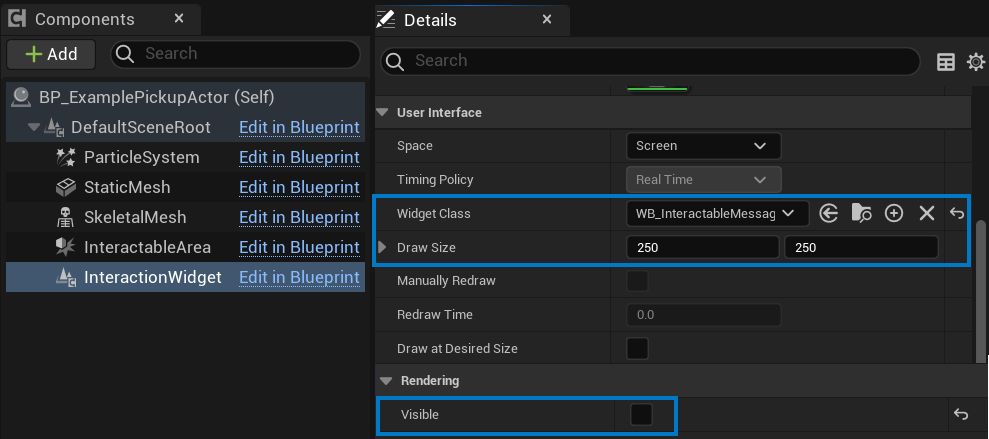
- Add a Widget Component to the actor:
- Set the Widget Class to
WB_InteractableWidget(or a custom widget if desired). - Set the default visibility to Hidden.
- Set the Widget Class to
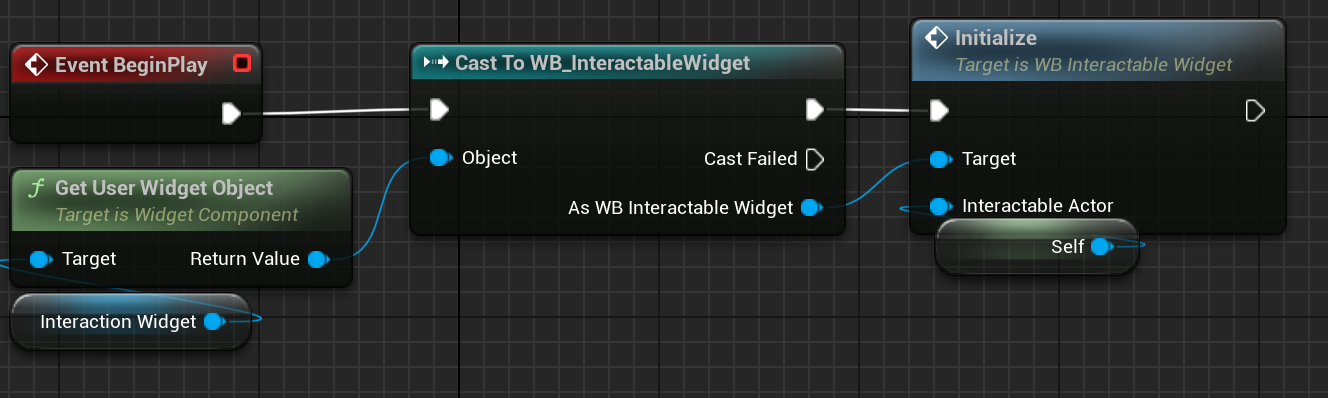
- Initialize Interactable Widget on Begin Play
- Add a boolean variable (e.g.,
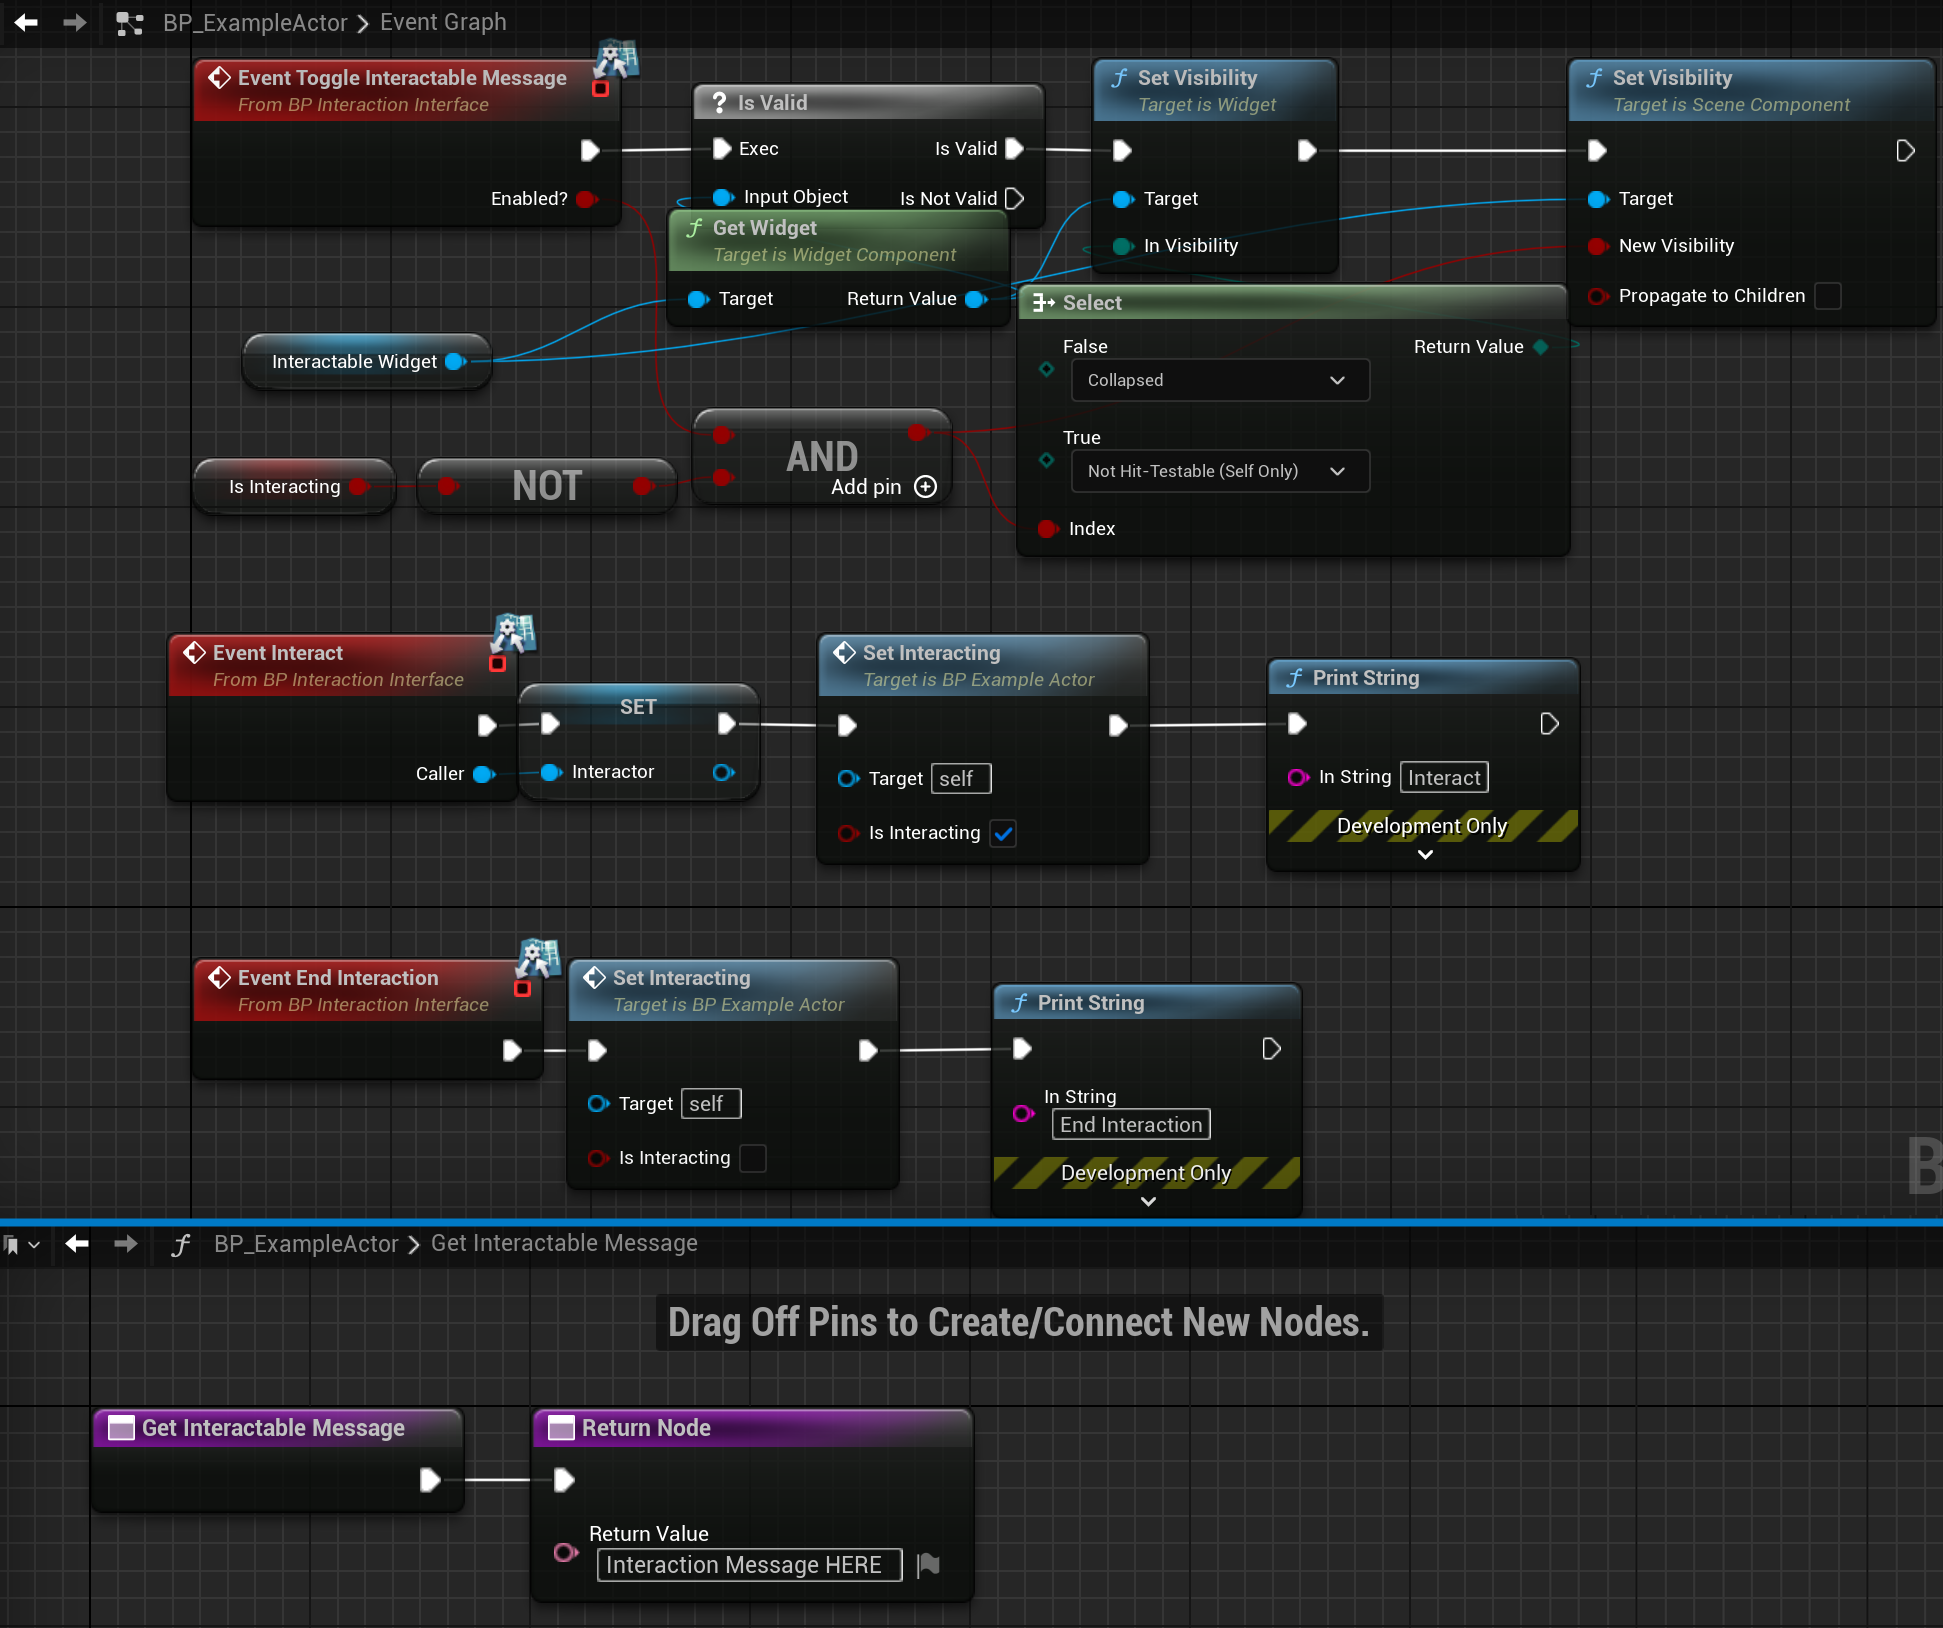
bIsInteracting) to track the interaction state. - Implement the following interface functions:
- ToggleInteractableMessage: Set the Widget Component’s visibility based on the input parameter (e.g., Visible if true, Hidden if false).
- Interact: Store the caller (interactor) reference, set
bIsInteractingto true, and call a customOnInteractionBeginfunction to handle initiator-driven logic, such as playing an interaction animation or activating an ability on the caller. - EndInteraction: Set
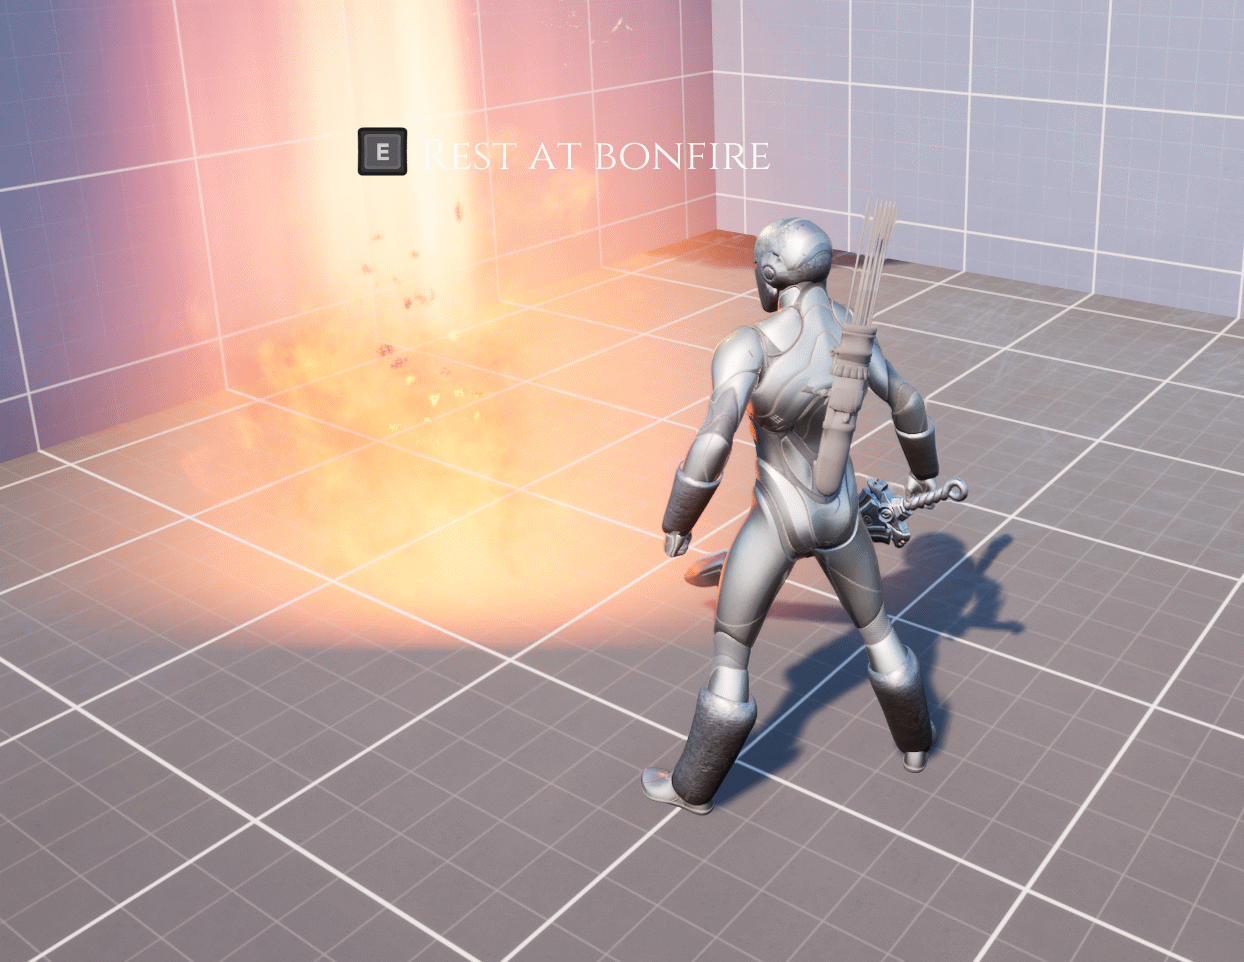
bIsInteractingto false and call a customOnInteractionEndfunction to clean up (e.g., stop the animation or deactivate the ability). - StartInteractableAction: Implement context-sensitive actions on the interactable actor, such as triggering a “Rest at bonfire” effect and respawning enemies when called by another system (e.g., a “Rest” button in a bonfire menu).
- GetInteractableMessage: Return a string for the interaction prompt (e.g., “Press [E] to Open Loot Chest” or “Press [E] to Rest at Bonfire”).
- Ensure the actor’s collision settings include the
Interactableobject type (e.g., set a component’s collision to respond to theInteractablechannel). - Place the custom actor in the level and test interactions.
Creating Custom Interaction Widgets
- Create a new Widget Blueprint (e.g.,
WBP_CustomInteractableWidget) in the Content Browser. - Design the widget (e.g., add a custom text block or image for the interaction prompt).
- In the interactable actor’s Blueprint, set the Widget Component’s Widget Class to
WBP_CustomInteractableWidget. - Ensure the
ToggleInteractableMessagefunction updates the Widget Component’s visibility.
Add Custom Interaction Animation
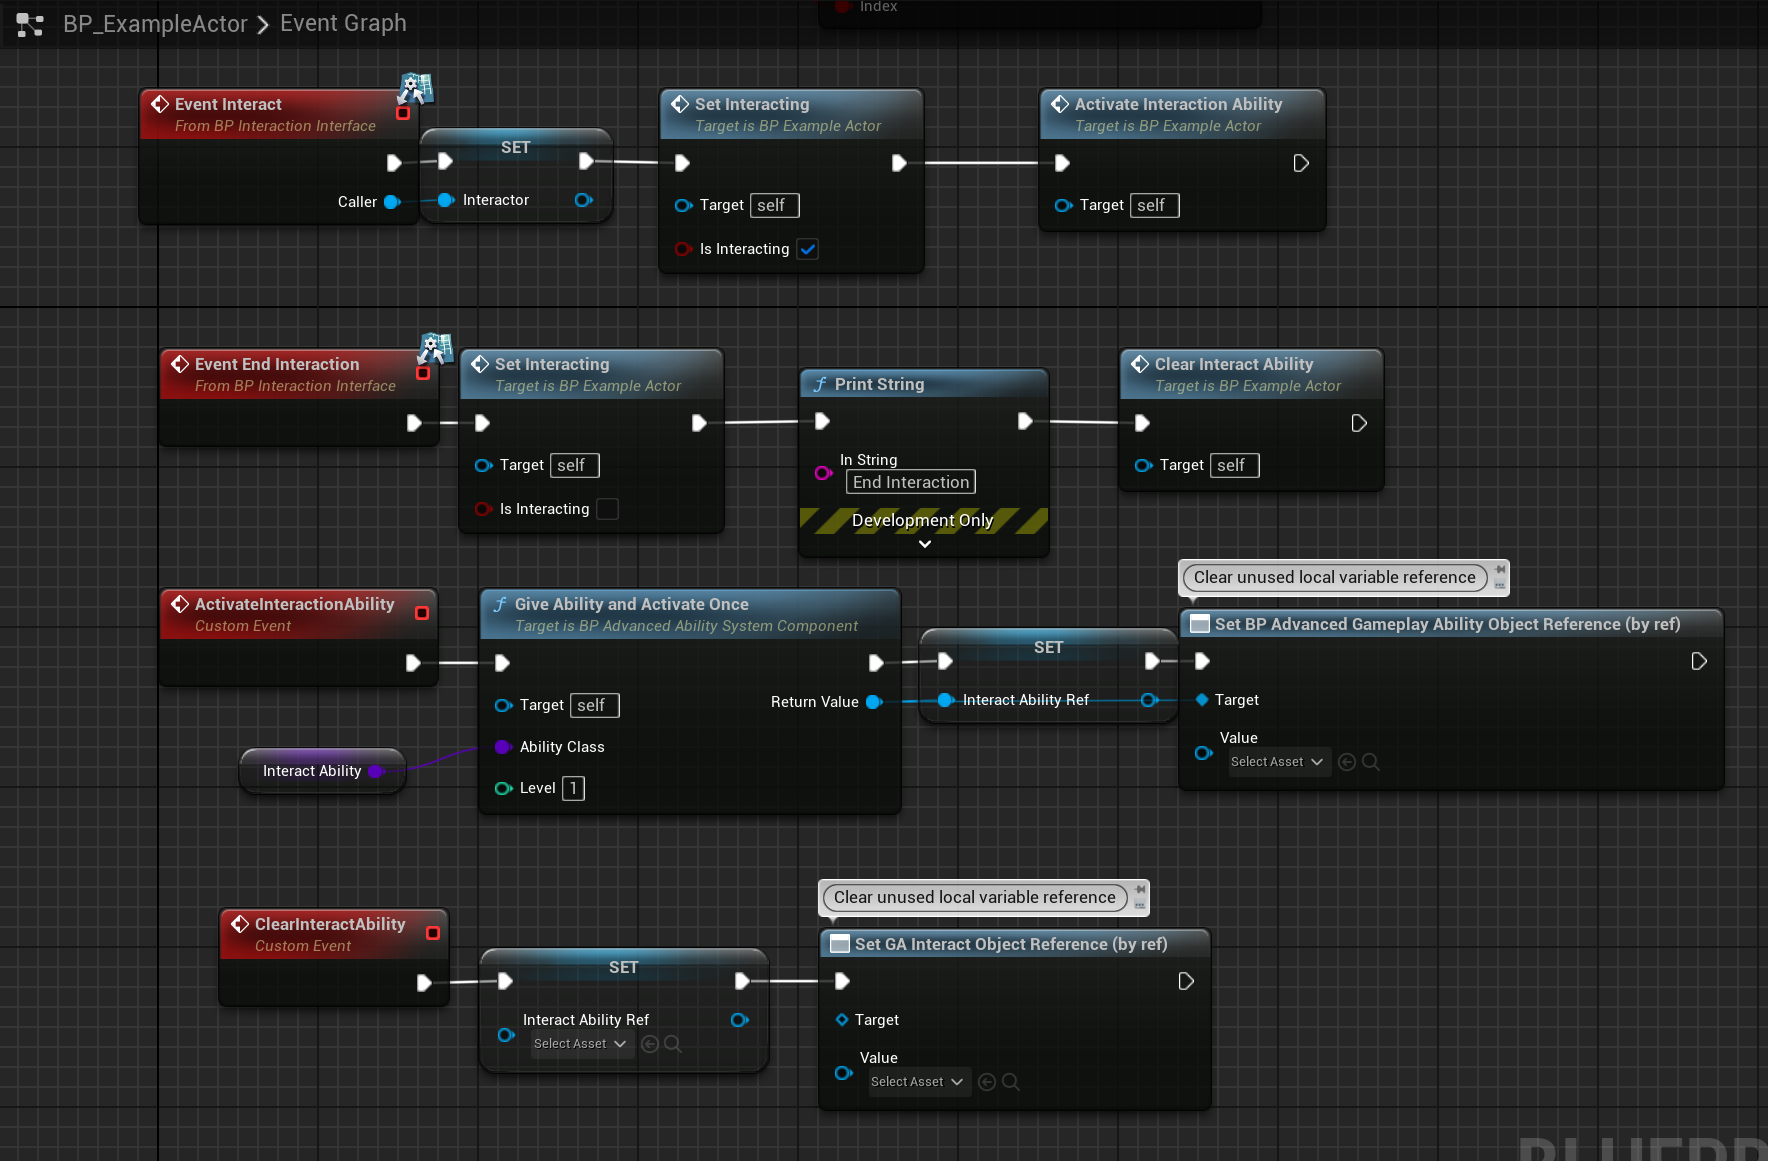
- Create custom animation for your interactable (or create an ability to activate this animation through)
- In your custom interactable on the overridden event: “Interact” add functionality here to get the Caller (Caller is an input for this function) and from the caller get a reference to the necessary system to activate an ability or play an animation.
- Use EndInteraction event to stop the ability, animation, or play an end interaction animation in a similar fashion as interacting. You likely will need to store a reference to the caller as a variable as EndInteraction doesn’t have a Caller input.
Implementing Context-Sensitive Actions
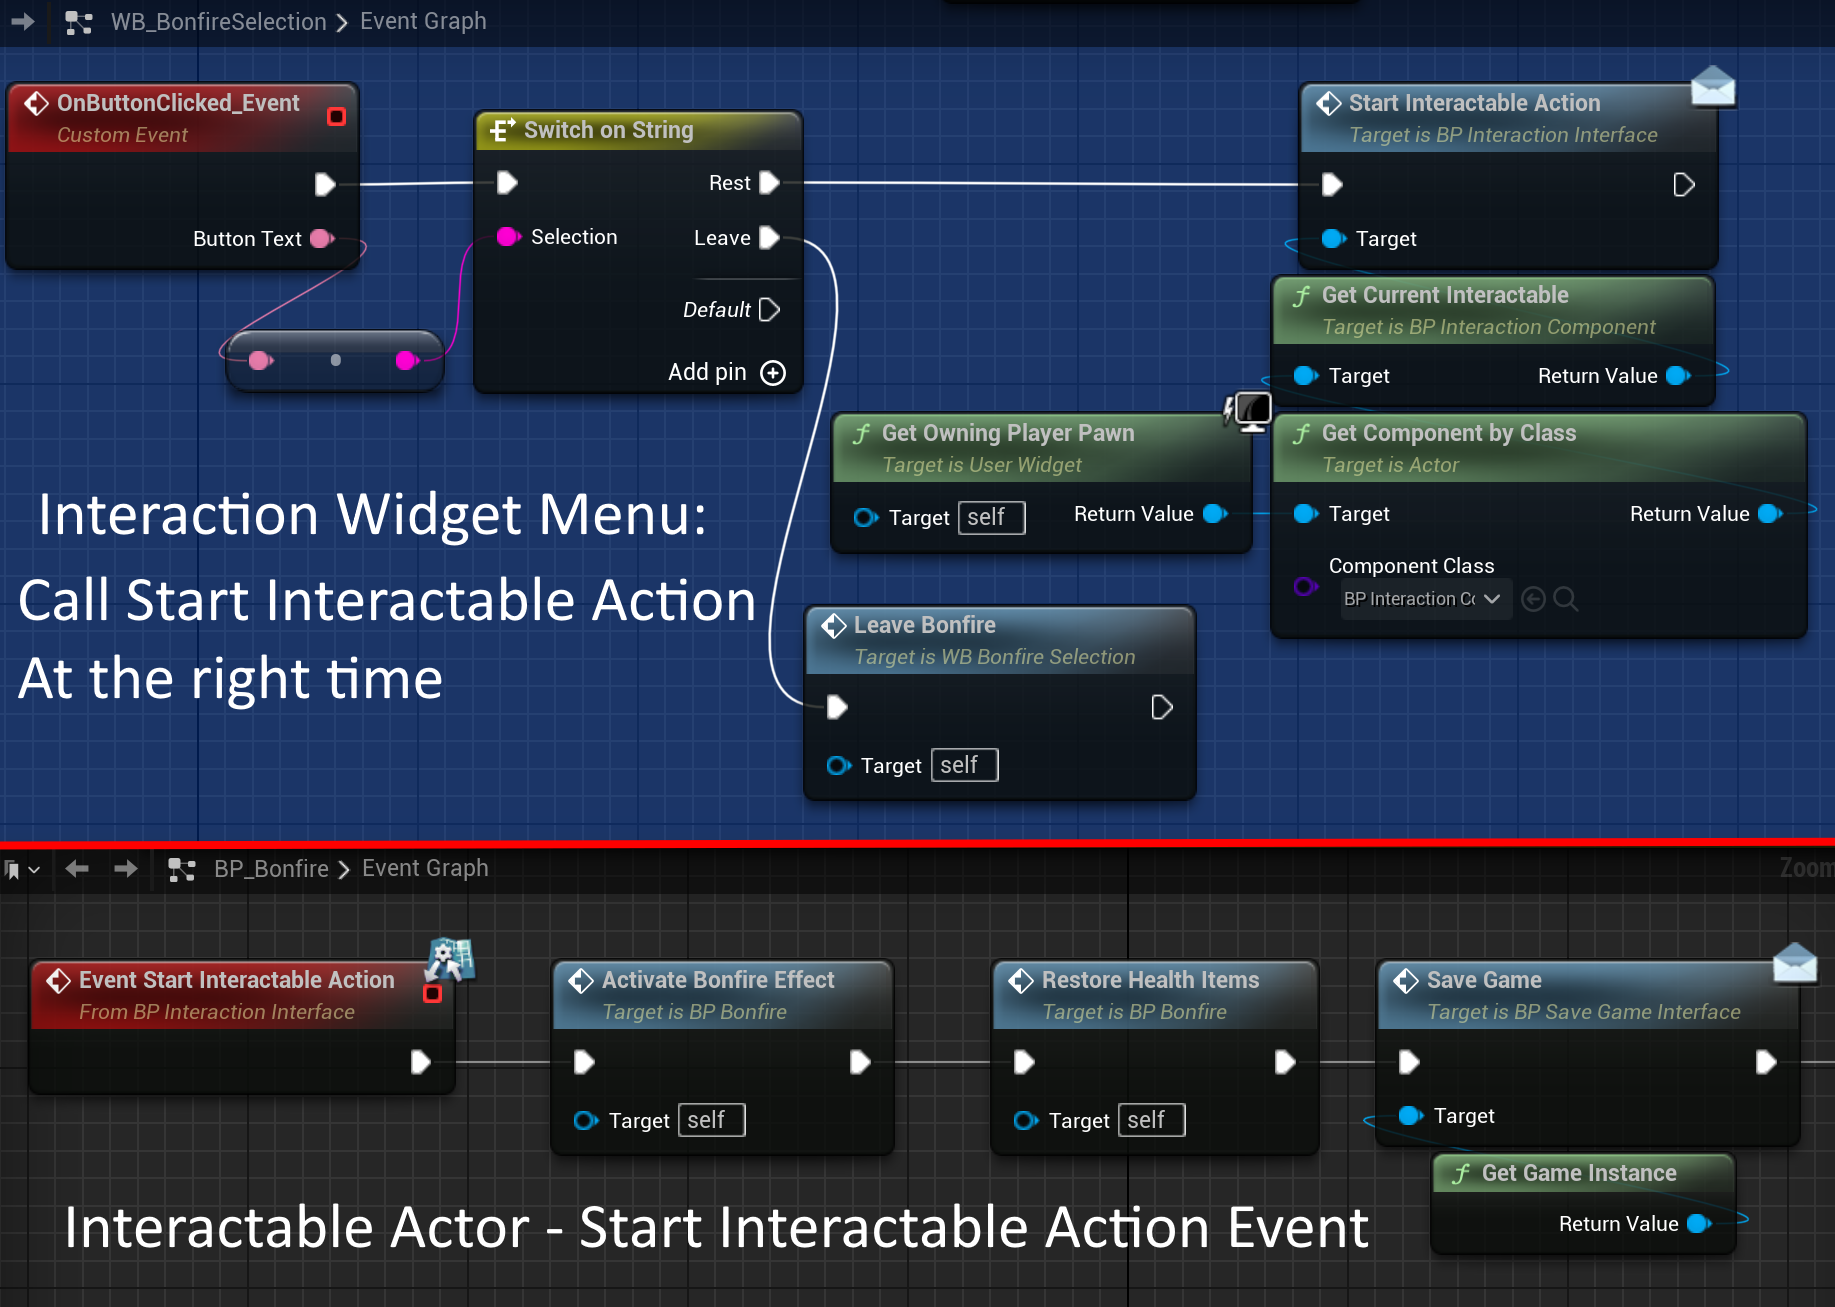
- In the interactable actor’s Blueprint, override the
StartInteractableActioninterface function. - Add logic for context-specific actions on the interactable actor, triggered by another system. For example:
- For a bonfire, implement logic to play a “Rest at bonfire” visual effect and respawn enemies when a “Rest” button is pressed in the bonfire menu.
- For a loot chest, trigger the transfer of items to the player’s inventory when a “loot” button is pressed in a loot menu.
- Ensure the calling system (e.g., a menu widget) retrieves the interactable actor reference (stored during
Interact) and callsStartInteractableActionwhen the action is triggered.
Customizing Interaction Properties
- Open the interactor’s Blueprint and select
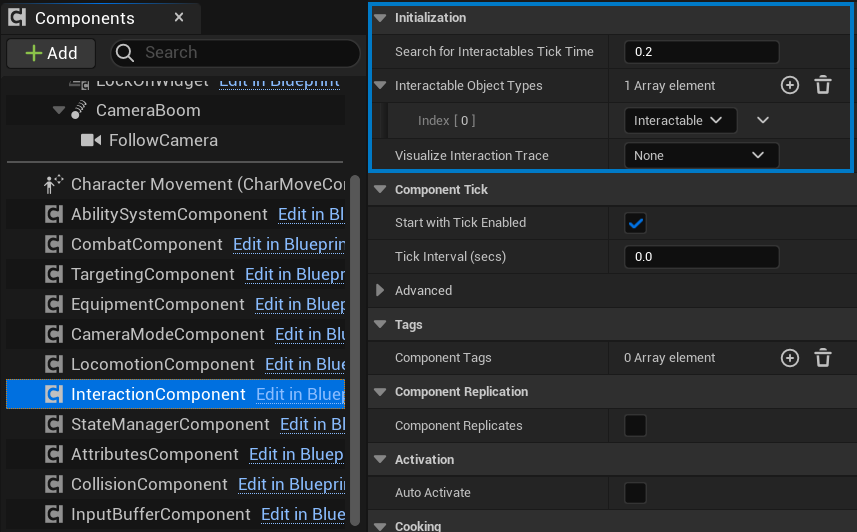
BP_InteractionComponent. - Adjust properties in the Details panel:
SearchForInteractablesTickTime: Decrease for more frequent searches or increase for better performance.InteractableObjectTypes: Add additional object types to expand the range of interactable actors.VisualizeInteractionTrace: Enable during development to debug the capsule trace.
- Save and test the changes in-game.
Notes:
- Always add the
Interactableobject type in Project Settings > Collision, as it is required for the system to function. - Use
bIsInteractingin interactable actors to manage state and prevent unintended interactions. - Optimize
SearchForInteractablesTickTimefor performance in scenes with many interactable actors. - Leverage
ANS_Interactfor animation-driven interactions to ensure smooth visual feedback. - Ensure
StartInteractableActionis called by the appropriate system (e.g., a menu) to trigger context-sensitive actions on the interactable actor.